ما را دنبال کنید

جستجوگر

موضوعات

  • تابلو روان
  • ساخت انیمیشن تابلو روان 6
  • معرفی انواع کنترلر تابلو روان 1
  • ساخت تابلو روان 6در6 1
  • آموزش ساخت انیمیشن تابلو روان 0
  • تابلو led ثابت
  • مدارات فلاشر(رقص نور) 39
  • انواع led 4
  • ساخت قاب تابلو 1
  • ساخت تابلو LED ثابت و روان 5
  • فلاشر با IC Atiny 1
  • فلاشر ledدو کانال 2
  • فلاشر ساده 5 کانال 2
  • مدار فلاشر با 555 2
  • ساخت قاب تابلو LED 2
  • فلاشر 20 کانال برای تابلو led 2
  • مدار ساخت فلاشر 7 کانال 2
  • مدار فلاشر -DANCE LED 2
  • فیلم های تابلو led 2
  • تابلو led ثابت سه رنگ 0
  • تابلو ال ای دی ثابت rgb 0
  • سیستم صوتی اتومبیل
  • ساخت باکس صوتی 1
  • آموزش سیستم صوتی اتومبیل 1
  • پروژه های الکترونیک
  • مدارات اکولایزر LED 10
  • ساخت فیش پروگرم کردن IC 1
  • فلاشر 200watt 1
  • مدار درایو led سفید 3
  • آموزش گام به گام ساخت فلاشر 5
  • پرژکتور led 4
  • ساعت led 3
  • نورپردازی ماشین 2
  • نورپردازی خانه 9
  • نورپردازی موتور سیکلت 2
  • نورپردازی دوچرخه 1
  • ساخت شوکر 330 ولت 3
  • مدار تشخیص نشت گاز 0
  • فلزیاب 4
  • مدار تست باتری خودرو 1
  • ساخت ساعت با میکرو 1
  • انواع پروژه های صوتی 6
  • پروژه تابلو روان سه رنگ 1
  • مدار تشخیص دهنده امواج موبایل 1
  • ساخت رگولاتور 10 آمپری 1
  • آموزش الکترونیک
  • شناسایی قطعات الکترونیکی 8
  • آشنایی با IC ها 2
  • سیم کشی برق ساختمان 0
  • مدارات جالب 90
  • مدارات ماشین 2
  • تبدیل ولتاژ12به220 3
  • آموزش ساخت pcb 3
  • نحوه تست قطعات الکترونیکی 3
  • آموزش تعمیر لامپ کم مصرف 2
  • ای سی لچ چیست؟ 2
  • ساختن فیبرمدارچاپی بااتو 1
  • آموزش نرم افزار پروتل99 1
  • دیتاشیت قطعات مهم 1
  • نحوه راه اندازی تریاک 1
  • استفاده از avr در محیط صنعتی؟؟؟ 1
  • خبر
  • مقالات
  • آموزش رایگان برق اضطراری (UPS) 2
  • ECU چیست؟ 2
  • آموزش اعلام حریق 1
  • آموزش رایگان آنتن مرکزی 1
  • بلوتوث و802.11همراه هم خدمات کاملی را ارایه میدهند 1
  • از صنعت برق چه مي‌دانيم ؟ 1
  • RFID چیست؟ 1
  • آموزش انتقال تصویر بر روی کامپیوتر و شبکه 1
  • باتری های قابل شارژ در تجهیزات همراه 1
  • آموزش رایگان درب اتوماتیک 1
  • ترانزیستور 2 1
  • خازنها 1
  • دیاگ چیست؟ 1
  • آموزش نصب ایفون تصویری 1
  • آموزشFPGA 0
  • ابر رساناها 1
  • اثر مغناطیسی جریان الکتریکی 1
  • جی پی اس؟ 1
  • انواع LNB 1
  • کدها مخفی رسیور 0
  • نکات مهم در خرید مولتی متر 1
  • آموزش ساخت فلاشر
  • آموزش AVR{برنامه نویسی میکرو} 17
  • تحلیل الکترونیکی مدارات
  • فلاشرled
  • فروش انواع فلاشر 2
  • ECU چیست؟ 1
  • انیمیشن تابلو روان 0
  • آموزش ساخت ساعت حرم
  • روش تست قطعات الکترونیک
  • تست دیاک 1
  • تست ترانزیستور 2
  • تست دیود 1
  • تست تریستور 1
  • تست سون سگمنت 1
  • تست تریاک 1
  • تست خازن 2
  • تست پتانسیومتر 1
  • تعمیرات وسایل الکترونیکی
  • تعمیر ماژول ال ای دی 1
  • جزوات دانشجویی
  • جزوه ماشین 1 1
  • جزوه ماشین 2 0
  • جزوءالکترو مغناطیس دانشگاه صنعتی شریف 1
  • بخش تلویزیونهای LED،LCD،PLASMA
  • راهنمای جامع خرید تلویزیون LED-LCD-PLASMA 1
  • جدول مصرت انواع تلویزیون 1
  • پروژه دانشجویی
  • آردینو(ardiuino)
  • آردینو چیست؟ 1
  • معرفی شرکت های معتبر
  • شرکت CL چین 1
  • ویدئو مدارات
  • فروش ساعت حرم
  • ساعت حرم امام رضا 0
  • ساعت دیجیتال 0
  • ساعت بانکی 0
  • روزشمار پروژه 0
  • دوربین مدار بسته و اکسسوری
  • آموزش ساخت تابلو نئون
  • آمارگیر

    • :: آمار مطالب
    • کل مطالب : 337
    • کل نظرات : 432
    • :: آمار کاربران
    • افراد آنلاين : 13
    • تعداد اعضا : 9440
    • :: آمار بازديد
    • بازديد امروز : 2,052
    • بازديد ديروز : 2,234
    • بازديد کننده امروز : 268
    • بازديد کننده ديروز : 244
    • گوگل امروز : 7
    • گوگل ديروز: 2
    • بازديد هفته : 5,860
    • بازديد ماه : 45,208
    • بازديد سال : 237,153
    • بازديد کلي : 4,659,522
    • :: اطلاعات شما
    • آي پي : 3.14.251.243
    • مرورگر : Safari 5.1
    • سيستم عامل :

    کدهای اختصاصی

    پرداخت حق عضویت سالیانه سایت

    پرداخت حق عضویت سالیانه از این قسمت


    تبلیغات


    کانال تلگرام مجستیک

    به کانال تلگرام مجستیک الکترونیک بپیوندید

    اموزش ساخت فیش پروگرم کردن آی سی بر روی برد PCB


    About AVR Programmer

    This simple AVR Programmer will allow you to painlessly transfer hex programs to most ATMEL AVR microcontrollers without sacrificing your budget and time. It is more reliable than most other simple AVR programmers available out there and can be built in very short amount of time.

    AVR programmer consists of in-circuit serial programmer (dongle) and small pcb with a DIP socket where you can fit your microcontroller and have it quickly programmed.

    You may also use this programmer as a stand alone in-circuit serial programmer that can be used to conveniently program AVR microcontrollers without removing them from the target circuit.

    Entire AVR programmer has been build with using common parts and fits in the case of the serial connector. The socket pcb has been created to fit a 28-DIP AVR ATmega8 microcontroller, but you can build a socket pcb for any other AVR microcontroller out there. This AVR programmer is compatible with a popular PonyProg software that shows you a status bar of the programming progress.


    AVR In-Circuit Serial Programmer


    AVR Programmer's PCB (front) with 9-PIN female RS232 serial connector.


    AVR Programmer's PCB (back)


    Fitting AVR Programmer's PCB in RS232 serial case.


    Finished AVR Programmer with standard 6-PIN ICSP connector.


    AVR Socket PCB

    Socket PCB has very minimal number of components and is used for programming your desired AVR microcontroller outside of your target circuit.


    Socket PCB with 28-DIP AVR ATmega8 microcontroller.


    There are two connections; ICSP that connects to AVR Programmer, and external +5V supply.


    Socket PCB consists of the PCB, 28-DIP socket, 4MHz crystal resonator, or crystal with two 22pF decoupling capacitors, and two header connectors. Two-PIN connector supplies +5V voltage to the AVR microcontroller, and 6-PIN ICSP connects to AVR Programmer dongle.

    Supplying microcontroller with external +5V voltage as opposed to taking it directly from computer's serial connection port ensures that the chip is receiving exactly +5V voltage and provides very reliable error free programming.


    Socket PCB for 28-DIP AVR ATmega8 microcontroller.

    +5V voltage supply for AVR chip may be provided from external power supply or even better - directly from USB connection.


    PonyProg

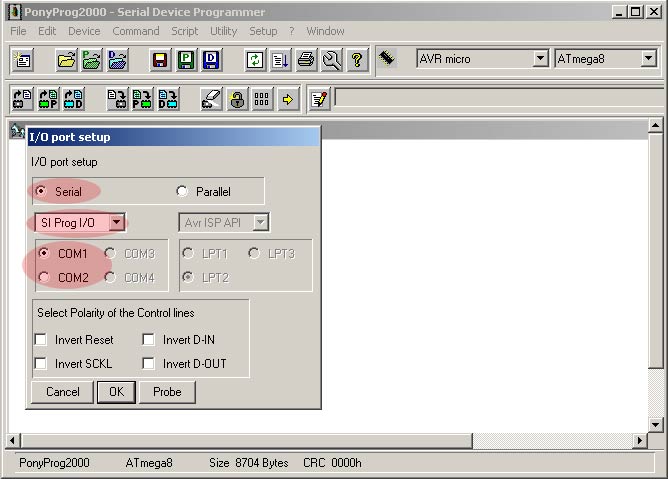
    To be able to send hex file from your computer to AVR microcontroller you will need to download and install PonyProg2000. After the installation, the first thing you will need to do is configure PonyProg to work with our AVR Programmer. To do this go to "Setup" menu and select "Interface Setup". The following window will be shown and highlighted areas show you exactly which options should be selected.


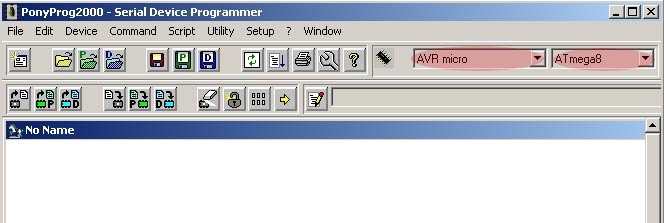
    In the next step select "AVR micro" and your microcontroller type that you will be programming (ex. ATmega8).


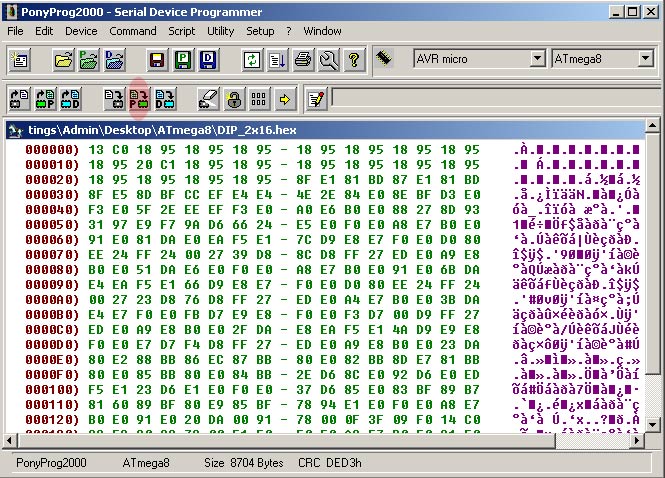
    At this point PonyProg configuration is complete and we can open hex program with which AVR microcontroller will be flashed. Go to "File" menu, select "Open Program (FLASH) File ...", and point to the hex file to open it up. You should see hex numbers as shown on the screen below. If you haven't connected AVR Programmer dongle to your computer's serial port yet, then now is the time. Make sure that AVR Programmer is physically connected to your AVR microcontroller through Socket PCB or through ICSP 6-PIN connector. Finally click on the highlighted icon "Write Program Memory (FLASH)", or go to "Command" menu and select "Write Program (FLASH)".


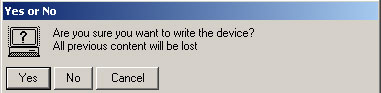
    Click on "Yes" button to confirm the programming.


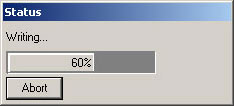
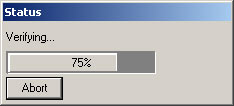
    Now sit tight, relax and watch the programming progress on the status bar. PonyProg will program AVR microcontroller and verify if the hex file was transferred without any errors. For your information this process shouldn't really take more than 10 to 30 seconds. This depends on the size of the program that you're trying to flash.


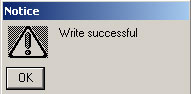
    After programming is completed "Write successful" window will be shown letting you know that AVR microcontroller has been programmed, and is now ready to be used.


    Related Links

    برچسب ها

    ارسال نظر

    کد امنیتی رفرش

    نظرات ارسال شده

    درباره ما

    آموزش الکترونیک و تابلوهای ال ای دی

    ارتباط با مدیر

    ارتباط با مدير